Did you know that cabinet resurfacing can dramatically change the look of your kitchen without the hefty price tag of a complete remodel? This cost-effective and sustainable option not only revitalizes your space but also keeps old cabinets out of landfills. Dive into the essential techniques and tips that will empower you to take on your cabinet resurfacing project with confidence!
What You Will Learn
- Preparation is Key: A safe and organized workspace is crucial for a smooth resurfacing process.
- Identify Your Cabinet Style: Knowing your cabinet style and materials aids in selecting the right resurfacing technique.
- Choose the Right Materials: Selecting appropriate paints, stains, or laminates will enhance your cabinets' appeal.
- Application Techniques Matter: Master brushing, rolling, or spraying to achieve a flawless finish based on your skill set.
- Troubleshoot Common Issues: Be prepared to address problems like bubbling or streaking during the resurfacing process.
- Hardware Selection Impacts Design: The right knobs, pulls, and hinges can elevate your cabinets' overall aesthetic.
Key Takeaways from Cabinet Resurfacing Techniques
Here are the essential points to keep in mind for a successful cabinet resurfacing project.
Preparation is Key
Create a safe and organized workspace to ensure a smooth process.
Choosing the Right Materials
Select paints, stains, or laminates that suit your cabinet style and desired finish.
Application Techniques Matter
Depending on your skills, you may choose brushing, rolling, or spraying for the best results.
Troubleshooting Common Issues
Be aware of potential problems like bubbling or streaking to address them promptly.
Hardware Selection Impacts Design
Choose knobs, pulls, and hinges that enhance your cabinets' aesthetic.
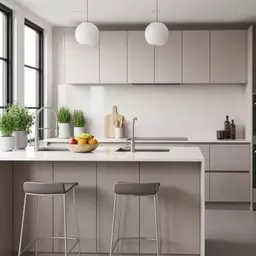
Understanding Cabinet Resurfacing Techniques for Your Project
Introduction to Cabinet Resurfacing and Its Benefits
When it comes to refreshing your kitchen, cabinet resurfacing is a fantastic option! It’s an affordable way to give your cabinets a whole new look without the expense of a full renovation. With benefits like cost-effectiveness and sustainability, it’s a win-win for homeowners looking to enhance their space. For more in-depth information, you can explore resources like the HowStuffWorks guide to kitchen cabinet resurfacing.
Think about it: by resurfacing your cabinets, you keep them out of landfills, reducing waste and promoting a more eco-friendly approach to home improvement. Plus, you can choose from an array of finishes and colors, allowing you to truly personalize your kitchen. Have you ever imagined how a simple change could transform your cooking space?
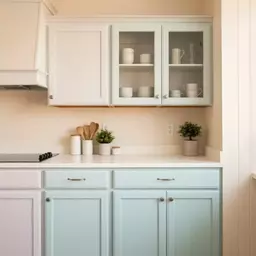
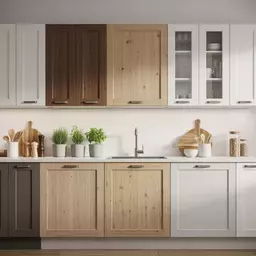
Identifying Your Cabinet Style and Materials
Before diving into the resurfacing process, it’s essential to know your cabinet style and materials. There are several styles to consider, such as traditional, modern, or farmhouse, each requiring a different approach. Identifying these styles helps you select the right technique for a successful transformation.
- Traditional: Often made from solid wood, these cabinets can be refinished with stains or paints.
- Modern: Typically featuring sleek lines, laminate surfaces can be resurfaced with high-gloss finishes.
- Farmhouse: Known for their rustic charm, these cabinets can often benefit from chalk paint or distressed finishes.
Understanding the materials is just as important. For instance, laminate cabinets might require a different treatment than solid wood ones. Take a moment to assess your cabinets; it’s the first step towards achieving your dream kitchen with the help of the Kitchen Refacing Guide!
Step-by-Step Instructions for Successful Cabinet Resurfacing
Preparing Your Work Area and Safety Precautions
Getting ready to resurface your cabinets also means preparing your workspace! Start by choosing a well-ventilated area and clearing out any clutter. This ensures you have a safe and organized environment to work in.
Don’t forget about safety gear! It’s crucial to protect yourself throughout the process. Here’s a quick checklist of essentials:
- Safety goggles: To protect your eyes from dust and splashes.
- Dust mask: Prevents inhalation of harmful particles.
- Gloves: Protect your hands from chemicals and rough surfaces.
With everything set up and your safety gear on, you’re ready to dive into the exciting world of cabinet resurfacing!
Surface Preparation Techniques for Optimal Results
Now that your workspace is prepared, it’s time to focus on surface preparation! Cleanliness is key; make sure to remove any grease, dirt, or old finishes. I like to use a mixture of warm soapy water for this task—it works wonders!
- Sanding: Lightly sand the surfaces to create a rough texture for better adhesion.
- Priming: Apply a primer suitable for your cabinet material, especially if you're switching colors.
By taking these steps seriously, you set the stage for a smooth and professional-looking finish. Remember, preparation is half the battle!
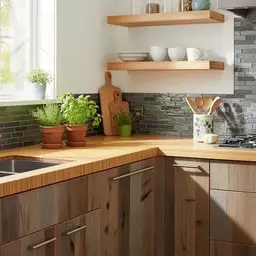
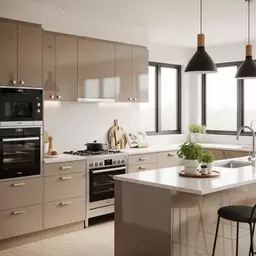
Selecting the Right Materials for Cabinet Resurfacing
Choosing the right materials can significantly impact the final look of your cabinets. Depending on your style, you have a range of options, including paints, stains, and laminates. Let’s break it down:
- Paint: Ideal for a fresh, vibrant look. Go for high-quality, durable paints that suit your cabinet material. This Old House offers excellent guidance on painting kitchen cabinets.
- Stains: Perfect for highlighting the natural beauty of wood. Choose tones that complement your overall kitchen design.
- Laminates: Great for modern finishes, available in various textures and colors.
Take your time in selecting materials—you want them to reflect your taste and stand the test of time, just like the transformations shared through the Kitchen Refacing Guide.
Application Techniques for Flawless Finishing
Once you’ve selected your materials, it’s time for the fun part—applying the finishes! There are several techniques to achieve a flawless look, and each has its advantages. Here’s a quick overview:
- Brushing: Offers precise control, but requires skill to avoid brush strokes.
- Rolling: Great for flat surfaces and can yield a smooth finish.
- Spraying: Provides an even coat, but requires practice and proper ventilation.
Experiment with these techniques to find what works best for you. The beauty of resurfacing is that each method can yield unique results, making your kitchen truly yours!
Troubleshooting Common Issues During Resurfacing
Even the best projects can hit a few bumps along the way! It’s common to encounter issues like bubbling or streaking during the resurfacing process. But don’t worry, I’ve got you covered with some quick fixes:
- Bubbling: This can happen when the surface isn’t properly prepped. Sand it down and reapply.
- Streaking: Often caused by improper application techniques. Try using a different brush or roller.
Being aware of these potential hiccups can help you stay calm and keep your project on track. Remember, every mistake is a learning opportunity!
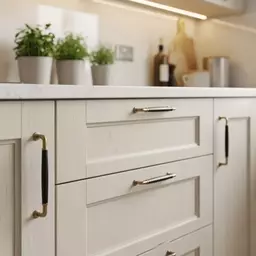
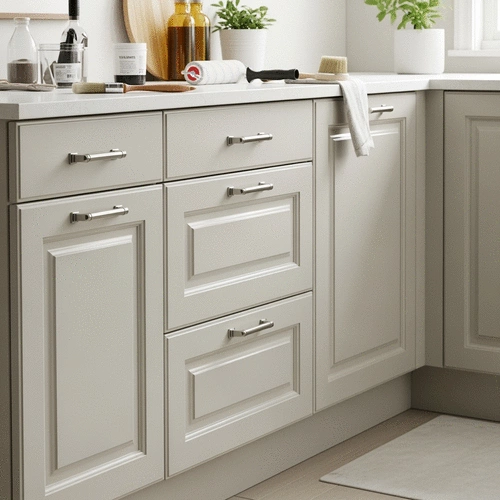
Incorporating Cabinet Hardware: Knobs, Pulls, and Hinges
Finally, let’s not forget about the finishing touches! Cabinet hardware like knobs, pulls, and hinges can make or break your design. Choosing the right pieces can enhance the overall look of your newly resurfaced cabinets. Here are some tips to consider:
- Style: Match the hardware style with your cabinet design for a cohesive look.
- Finish: Choose finishes that complement your cabinet colors, such as brushed nickel for a modern feel.
- Size: Ensure the size of the hardware is proportional to your cabinets.
By carefully selecting your hardware, you elevate your kitchen’s charm, reflecting the personal touch of the Kitchen Refacing Guide!
Pro Tip
When selecting paints for your cabinet resurfacing project, consider using a paint with a built-in primer. This can save you time and ensure better adhesion, especially if you're changing colors significantly. A quality paint can also provide added durability, making your cabinets resistant to scratches and stains.
Frequently Asked Questions About Cabinet Resurfacing
- What are the main benefits of cabinet resurfacing?
- Cabinet resurfacing offers cost-effectiveness and sustainability, allowing you to update your kitchen's look without the expense and waste of a full remodel. It also provides an opportunity for personalization with various finishes and colors.
- How important is it to identify my cabinet style and material?
- It's crucial. Knowing your cabinet style (e.g., traditional, modern, farmhouse) and material (e.g., solid wood, laminate) helps you choose the most appropriate resurfacing technique and materials for a successful and lasting transformation.
- What safety precautions should I take during cabinet resurfacing?
- Always work in a well-ventilated area and clear any clutter. Essential safety gear includes safety goggles to protect your eyes, a dust mask to prevent inhalation of particles, and gloves to protect your hands from chemicals and rough surfaces.
- What are the key steps for surface preparation?
- Surface preparation involves thorough cleaning to remove grease, dirt, and old finishes. Lightly sand the surfaces for better adhesion, and apply a primer suitable for your cabinet material, especially if you plan to change colors.
- What are the common application techniques for resurfacing, and which should I choose?
- Common techniques include brushing (for precise control), rolling (for smooth finishes on flat surfaces), and spraying (for even coats, requiring practice and ventilation). The best technique depends on your skill level and desired finish.
- How can I troubleshoot common issues like bubbling or streaking?
- Bubbling often indicates improper surface preparation; sand down the affected area and reapply. Streaking is usually caused by incorrect application techniques; try using a different brush or roller to achieve a smoother finish.
- Why is hardware selection important for resurfaced cabinets?
- Hardware like knobs, pulls, and hinges are the finishing touches that can significantly enhance your design. Choose pieces that match your cabinet style, complement the colors, and are proportional to your cabinets for a cohesive and elevated look.
Summarizing Key Takeaways from Cabinet Resurfacing Techniques
As we've explored throughout this article, cabinet resurfacing can be a fantastic way to refresh your kitchen without the hefty price tag of a complete remodel. The main points to keep in mind include the importance of thorough preparation and thoughtful material selection. Without these critical steps, your project could face challenges that might detract from the beautiful results you desire.
Let’s quickly recap some of the essential takeaways:
- Preparation is Key: Create a safe and organized workspace to ensure a smooth process.
- Choosing the Right Materials: Select paints, stains, or laminates that suit your cabinet style and desired finish.
- Application Techniques Matter: Depending on your skills, you may choose brushing, rolling, or spraying for the best results.
- Troubleshooting Common Issues: Be aware of potential problems like bubbling or streaking to address them promptly.
- Hardware Selection Impacts Design: Choose knobs, pulls, and hinges that enhance your cabinets' aesthetic.
By keeping these factors in mind, you’ll set yourself up for a successful cabinet resurfacing project that truly transforms your kitchen space! Remember, at the Kitchen Refacing Guide, we believe that every homeowner can achieve their dream kitchen with the right knowledge and tools.
Encouraging Action and Next Steps for Your Cabinet Resurfacing Project
Now that you’re armed with the knowledge of cabinet resurfacing techniques, it’s time to take action! I encourage you to share your own experiences and tips in the comments below. Have you tackled a kitchen project recently? Your insights could help fellow homeowners on their journey!
Don’t forget to subscribe to the Kitchen Refacing Guide for updates on innovative design ideas, material tips, and exclusive resources. Also, be sure to explore additional resources like instructional videos and material suppliers to get the best materials for your project!
- Engage with Us: Share your stories and questions in the comments.
- Subscribe: Get regular updates and expert advice right to your inbox.
- Explore Resources: Check out our recommended suppliers and links for further learning.
With a little creativity and effort, your resurfaced cabinets can become a stunning focal point in your kitchen. I can’t wait to hear about your transformations! Are you ready to start your project?
Recap of Key Points
Here is a quick recap of the important points discussed in the article:
- Preparation is Key: Ensure a safe and organized workspace to facilitate a smooth resurfacing process.
- Identify Cabinet Style and Materials: Understanding your cabinet style (traditional, modern, or farmhouse) helps in selecting appropriate resurfacing techniques.
- Select the Right Materials: Choose paints, stains, or laminates that complement your cabinets and desired aesthetic.
- Master Application Techniques: Experiment with brushing, rolling, or spraying to find the best finishing method for your skills.
- Troubleshoot Common Issues: Be prepared to address problems like bubbling or streaking promptly to maintain a professional finish.
- Enhance Design with Hardware: Select knobs, pulls, and hinges that match your cabinet style and enhance the overall look.